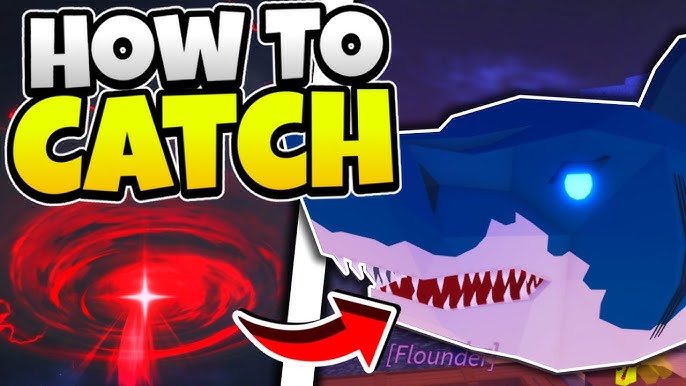
If you’ve spent any real time playing Fisch on Roblox, you already know the Megalodon isn’t just another entry on your fish list. It’s the moment your friends stop scrolling their phones and actually watch your screen. It’s the fish that turns a chill afternoon session into a full-blown, heart-pounding event where you’re gripping your mouse like it owes you money. And yeah, it’s also one of the most frustrating catches in the entire game if you go in unprepared.
I’ve spent a stupid number of hours chasing this shark, burned through more Sundial Totems than I’d like to admit, and lost more than a few Megalodons at the very last second of the reel. So this guide isn’t theory — it’s everything I wish someone had told me before I started, laid out in one place so you don’t have to learn it the hard way.
Let’s get into it.
What Exactly Is the Megalodon in Fisch?
Before you go chasing it, it helps to understand what you’re actually up against. The Megalodon is one of the biggest and most iconic exotic fish in Fisch, modeled after the real prehistoric super-predator shark that dominated ancient oceans. In-game, it’s a massive, heavy-hitting catch that can weigh anywhere from roughly 50,000 KG up to 150,000 KG depending on the roll, and landing one nets you a hefty base XP reward along with a solid cash payout when sold.
But the real reason players chase it isn’t the coin — it’s the bragging rights and the spectacle. Catching a Megalodon triggers a full cinematic moment: the water churns, the shark launches out of the ocean with glowing eyes and crackling energy, and your screen basically throws a celebration on your behalf. If you’re the type who plays for those “holy crap, did that just happen” moments, this is one of the best the game has to offer.
On top of the standard Megalodon, there are rarer variants floating around too — including the Ancient Megalodon and the elusive Phantom Megalodon, which only appears during eclipses. We’ll touch on those later, but first, let’s focus on catching the standard version, since that’s your starting point regardless.
Step 1: Get to the Ancient Isle
Everything starts here. The Megalodon doesn’t spawn just anywhere in the ocean — it’s tied to a specific location known as the Ancient Isle, tucked in the open water between Snowcap Island and Mushgrove Swamp. This isn’t a place you stumble into casually; you need to actively sail out there.
Here’s how to make the trip:
- Talk to the shipwright NPC on whichever island you’re currently on and spawn your boat.
- Head out into open water and set your course toward the Ancient Isle. As you get closer, your map or GPS should start highlighting the island in a distinct color, making it easier to track your heading.
- Stay alert during the journey. The waters around Ancient Isle are notorious for hazards — floating dynamite, spikes, and whirlpools that can chip away at your boat’s health if you’re not paying attention. Slow down as you approach and steer around anything that looks remotely dangerous. Losing boat health mid-journey is an annoying way to delay your hunt.
- Once you’re behind the island itself, you’re in the right zone. This is where Megalodon Hunts actually take place.
A tip here: don’t rush this part. A lot of players gun it straight through debris fields because they’re excited to start fishing, then end up repairing a boat instead of casting a line. Patience on the sail out saves you time overall.
Step 2: Understand the Megalodon Hunt Event
This is the part that trips up most beginners. You cannot just sail up to Ancient Isle and fish for a Megalodon whenever you feel like it. It only becomes catchable during a special, randomly-occurring server event called a Megalodon Hunt.
Here’s what you need to know about how this event works:
- It’s server-wide. When a Megalodon Hunt starts, everyone on your server gets a notification. This also means you’re not fishing alone — other players may show up to the same hunt.
- It’s tied to the day/night cycle. Megalodon Hunts have a chance to trigger at the transition between day and night, though the odds on any single transition are relatively low.
- Look for the marker in the sky. When a hunt is active, you’ll notice a distinct cloud formation hanging over the ocean behind Ancient Isle. That’s your visual cue that the event is live and where to head.
- Find the red zone. Beneath that cloud, there’s a square-shaped, red-shaded patch of water — sometimes shown on your fish radar as a red circle. This zone is where the Megalodon can actually be hooked. Casting outside of it does nothing for your Megalodon chances.
- The event doesn’t last forever. Megalodon pools typically despawn after a limited window, so once you spot the hunt, don’t dawdle — get your boat positioned and start casting.
If you’re fishing solo and no one else is around, great — the whole hunt is yours. If other players are also casting into the same red zone, be aware that only one person walks away with the Megalodon per catch, so there’s a bit of competition baked into the event.
Step 3: Speed Up the Wait With Sundial Totems
Waiting around for a random day/night transition to hopefully trigger a hunt is painfully slow if you’re relying purely on luck. Thankfully, there’s a workaround that most serious Megalodon hunters swear by: Sundial Totems.
Sundial Totems are consumable items that instantly skip the in-game day/night cycle forward. Since Megalodon Hunts have a chance to spawn at each of these transitions, using totems back-to-back effectively lets you “reroll” your odds much faster than waiting in real time.
Here’s the strategy:
- Head to the location where Sundial Totems are sold (commonly found on Sunstone Island) and stock up on a decent supply. They aren’t free, so budget accordingly — mid-game players with steady cash flow will get the most value from stockpiling these.
- Sail out to Ancient Isle and position your boat behind the island, ready to fish.
- Start using totems one after another. Each use forces a day/night switch, essentially giving you another shot at the hunt spawning.
- Keep an eye on the sky for that telltale cloud marker. Once it appears, stop popping totems and start paying attention to your surroundings — the hunt has begun.
If totems feel too expensive to spam solo, team up. A lot of squads split the totem cost between multiple players so nobody’s footing the whole bill, and if you’re on a busier server, you can sometimes get lucky by server-hopping into a session where other players (sometimes referred to as “whales” for their spending) are already spamming totems on your behalf. Either way, this method turns a passive waiting game into something you actually have control over.
Step 4: Choosing the Best Rod for the Job
This is where a lot of new players fail before they even get a bite. The Megalodon is enormous — we’re talking tens of thousands of kilograms — and most starter or mid-tier rods simply don’t have the weight capacity or resilience stats to handle it. Casting with the wrong rod means you’ll either fail to hook it at all or lose it mid-fight.
Here’s a breakdown of rods that consistently get recommended for Megalodon hunting:
Steady Rod
This is the most commonly recommended entry point for Megalodon hunting. It offers solid resilience and control, which makes the reeling minigame noticeably more manageable when you’re up against a fish this strong. If you’re newer to high-tier fishing and don’t have access to premium gear yet, this is your best bet.
Reinforced Rod
Another dependable choice with the stats needed to handle heavyweight catches. It’s a great alternative if you already have it unlocked and don’t want to grind toward something rarer just yet.
King’s Rod
For players chasing more consistent results, the King’s Rod is a step up. Pairing it with the right enchantment (more on that below) makes a noticeable difference in how forgiving your reeling attempts are.
Rod of the Depths / Rod of the Forgotten Fang
Some advanced rods with disturbance stats can actually help trigger Megalodon Hunts naturally while fishing at Ancient Isle, on top of being capable of catching the fish itself. If you own one of these, they pull double duty.
Abyssal Specter Rod (for Ancient Megalodon specifically)
If you’re aiming for the rarer Ancient Megalodon variant later on, this rod is frequently cited as the best tool for the job thanks to its stat spread covering the shark’s brutal resilience and progress-speed penalties.
Bottom line: whatever rod you choose, make sure its maximum weight capacity comfortably clears 50,000 KG at minimum, since that’s the floor for a standard Megalodon’s weight range.
Step 5: Enchantments That Actually Matter
Once you’ve settled on a rod, enchanting it correctly can be the difference between a clean catch and watching your line snap in frustration.
- Hasty is one of the most recommended enchantments for Megalodon hunting when paired with a King’s Rod. It improves your reeling speed, which matters a lot against a fish that fights back hard and can shred your progress bar in seconds.
- Look for enchantments that boost control or resilience more broadly if Hasty isn’t available to you yet. Anything that makes the reeling minigame more forgiving is worth prioritizing over pure luck-based enchants for this specific fight.
Don’t skip this step. A great rod with a poor enchantment still leaves you vulnerable to losing the fish during its more aggressive attack phases (more on that in a second).
Step 6: Best Bait for Megalodon
Bait matters more than people think. Using the Megalodon’s preferred bait doesn’t just improve your odds of it biting — it can also affect the overall quality of your session at the hunt location.
The two standout choices are:
- Shark Head — widely regarded as the Megalodon’s favorite bait. You’ll typically find this inside Quality Bait Crates, and it’s worth stocking up on a handful before you head out to Ancient Isle.
- Tryhard Worm — another bait the Megalodon responds well to, useful as a backup if you’re struggling to source Shark Heads.
If you’re going for rarer variants like the Ancient Megalodon, Truffle Worm is another bait worth having in your inventory, obtainable from Quality Bait Crates, Coral Geodes, and Volcanic Geodes.
Pro tip: don’t just bring one piece of bait. Hunts can take multiple casts before you actually hook a Megalodon (remember, it’s competing with every other fish in that zone), so bring enough Shark Heads to last through several attempts.
Step 7: Stack Your Luck Before You Cast
Because the Megalodon isn’t guaranteed on every cast into the red zone — it’s essentially rolling against a pool of possible catches — luck boosts genuinely move the needle. Here’s what to consider stacking before you start fishing:
- Totems that boost luck, which can multiply your odds of a rarer catch appearing in your line’s result.
- Server Luck boosts, if you’re willing to spend a bit extra for a higher chance during your session.
- In-game luck upgrades from vendors or trainers, which offer a permanent boost without needing to be reapplied every time.
None of these guarantee a Megalodon on your next cast, but stacking multiple luck sources meaningfully shortens how many casts you’ll need before landing one. If you’re specifically hunting the Ancient Megalodon variant, luck becomes even more critical, since it’s dramatically rarer than the standard version.
Step 8: Nailing the Actual Catch
Okay — you’ve got the rod, the bait, the location, and the event is live. Now comes the part that separates a clean Megalodon catch from a heartbreaking loss: the reeling minigame itself.
A few things to keep in mind once you’re hooked:
- Watch for the rampage. The Megalodon has a chance to go into an aggressive “rampage” state during the fight, which chips away at your reeling progress and temporarily shrinks your control bar. This ability has a cooldown between uses, so don’t panic — just be ready to steady your input and let your control bar recover before pushing hard again.
- Stay smooth, not aggressive. Overcorrecting your reel input when the fish pulls hard is one of the most common ways players lose progress. Small, controlled adjustments tend to outperform frantic clicking.
- Don’t tab out or get distracted. This sounds obvious, but the reel fight can take a while against a fish this heavy, and losing focus for even a couple of seconds during a rampage phase can cost you the whole catch.
- Trust your gear. If you followed the rod and enchantment recommendations above, the fight is winnable — it’s designed to be tough, not impossible.
When you finally land it, you’ll know immediately. A rainbow exclamation mark and a distinct sound effect confirm the catch, followed by that satisfying cutscene of the shark breaching the surface.
Bonus: Chasing the Rarer Variants
Once you’ve got a standard Megalodon under your belt, you might find yourself wanting more — either for the flex, for extra XP, or to complete certain quests.
Ancient Megalodon
This is the rarest version of the Megalodon and one of the toughest catches in the entire game. It only appears during the same Megalodon Hunt event, but its spawn rate within that pool is far lower than the standard variant. It also fights dramatically harder, with very low resilience and a heavily negative progress speed stat, meaning your reeling bar drains fast if you’re not using top-tier gear. The Abyssal Specter Rod is frequently recommended here specifically because it’s built to offset those brutal stats. Stack every luck source you can get your hands on, because patience (and a lot of totem spamming) is basically mandatory for this one.
Phantom Megalodon
This variant swaps out the standard spawn conditions entirely — instead of appearing during a regular hunt, it can only show up during an eclipse or the night immediately following one. If you’re hunting for this specific shark, keep an eye on in-game eclipse events and treat those windows as your golden opportunity.
Both of these variants are massive time investments, so don’t expect to land one on your first few attempts. Treat the standard Megalodon as your training ground for gear and technique before diving into these harder versions.
Common Mistakes to Avoid
Before you head out, here’s a quick rundown of the mistakes that trip up most players chasing this fish for the first time:
- Using a rod that can’t handle the weight. If your rod’s max capacity doesn’t clear 50,000 KG, you’re wasting casts.
- Fishing outside the red zone. The visual marker matters — casting nearby but not inside it won’t work.
- Not stocking enough bait. Running out of Shark Heads mid-hunt means missing your best odds right when the event is active.
- Ignoring boat hazards on the way there. A damaged or destroyed boat mid-journey can cost you the entire hunt window.
- Panicking during the rampage phase. Overreacting to the fish’s aggressive pulls often does more harm than good.
- Giving up after one failed hunt. Megalodon Hunts are random and competitive when other players show up. It often takes several hunts and casts before your first successful catch.
Final Thoughts
The Megalodon is exactly the kind of catch Fisch was built around — a genuine test of preparation, patience, and reflexes that feels incredible to finally pull off. Getting there isn’t about one lucky cast; it’s about stacking the odds in your favor at every stage: sailing to the right spot, triggering the hunt efficiently with Sundial Totems, gearing up with a rod and enchantment that can actually handle the fight, bringing the right bait, and keeping your composure once that line finally goes tight.
Go in prepared with everything in this guide, and it’s really just a matter of time before you’re watching that shark burst out of the water on your own screen. Tight lines, and good luck out there behind the Ancient Isle.

Alex Smith
I’m a dedicated gamer who loves exploring games, mastering gameplay mechanics, and sharing gaming knowledge. I stay updated with the latest releases, tips, and strategies to improve performance and enjoyment. Gaming is my passion and my skill.