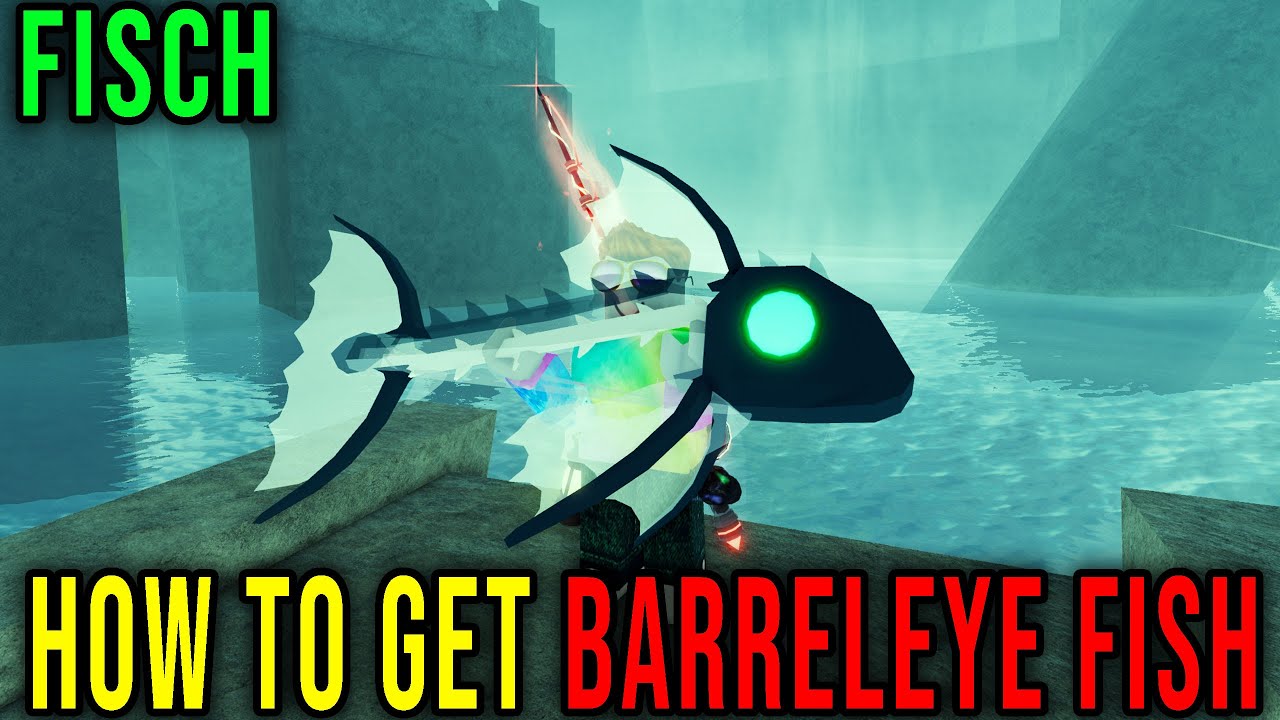
If you’ve spent any real time fishing in The Depths, you already know the feeling. You’ve got a good rod equipped, you’ve been casting for what feels like an hour, and every fish that pops up is something you already have three of. Meanwhile, somewhere out there, other players are posting screenshots of a weird, spiky, transparent-headed creature with glowing green eyes and a name that sounds like it belongs in a deep-sea documentary: the Barreleye.
I’m not going to tell you this fish is easy. It’s a Mythical rarity, which means it was never designed to fall into your net on the first cast. But “hard” and “random” are two different things, and the Barreleye is more the former than the latter. Once you understand what actually influences its spawn chance, fishing for it stops feeling like a slot machine and starts feeling like a checklist. That’s the goal of this guide — to strip out the guesswork and give you an actual plan.
By the end of this, you’ll know exactly where to go, what to bring, when to fish, and how to survive the reel-in without losing the fish at the last second. Let’s get into it.
What Exactly Is the Barreleye, and Why Is It So Annoying to Catch?
The Barreleye is a Mythical-rarity fish added during the Depths expansion update in Fisch. Lore-wise, it’s based on the real-world barreleye fish, the deep-sea species famous for its transparent, dome-shaped head. In the game, it’s got a more horror-movie makeover — spiked body, pale fins, and a set of glowing eyes that make it look like it belongs somewhere far darker than a normal aquarium.
Two things make this fish notoriously frustrating to catch:
First, it can only be found in one location: The Depths. This isn’t a fish you’ll stumble into while casually fishing near your starting island. You have to actually unlock and travel to a specific late-game area before you even have a chance at seeing one.
Second, when you do hook it, it fights back. The Barreleye applies a flat -15% progress speed penalty during the reeling minigame, and it doesn’t move predictably — it darts around the fishing bar in a way that catches unprepared players off guard. Combine a rare spawn with a genuinely difficult minigame, and you get a fish that has earned its reputation as one of the more painful bestiary entries to complete.
There was also a period where this fish was flat-out unobtainable due to a bug — it simply wasn’t spawning for anyone, no matter what they did. That’s been fixed since Hotfix 1.06.1, so if you’re fishing on a current, updated version of the game, the fish is out there and catchable. If you were trying (and failing) to get it before that patch, it wasn’t your technique — it was the game.
Step One: Getting Into The Depths
Before you can even think about bait and timing, you need access to the location itself. This is genuinely the biggest barrier for most players, so let’s walk through it properly.
Finding Vertigo
The Depths isn’t accessible directly. It sits behind a hidden sub-area called Vertigo, and Vertigo itself isn’t something you can sail to like a normal island. Instead, you need to find a Strange Whirlpool that randomly spawns somewhere out in the open ocean.
You’ll know a Strange Whirlpool has appeared because the game sends you a notification when one spawns on your server. The tricky part is actually locating it once you know it exists. Regular whirlpools are scattered around the map and will kill you if you jump into the wrong one, so you need to be able to tell them apart.
The Strange Whirlpool is distinguished by a visible beam or line of light shooting up from the ocean surface, almost like an aura. If you bump your graphics settings up while you search, it becomes much easier to spot this beam against the water and skyline. Hop on your boat, scan the horizon, and head toward it once you’re confident you’ve found the right one. Jumping in triggers a short cutscene that drops you into Vertigo.
Completing the Vertigo Bestiary
Once you’re in Vertigo, you’re not done — you now need to fully complete the Vertigo bestiary before the gate to The Depths will even open for you. This means catching every fish species that spawns in this area, which will take a genuine grinding session on its own.
Head down to the bottom of the map in an area sometimes called the Vertigo Dip, where you’ll find a fishing spot near an NPC called Synth. This is where most of the Vertigo-exclusive catches happen. Settle in, keep casting, and work through the bestiary one species at a time.
One species in that bestiary deserves special mention:
Catching the Depths Key
The Depths Key is the literal, physical key you need to unlock the gate. It’s a high-rarity catch in its own right, and unlike most fish, it doesn’t have picky preferences — no specific bait, no required weather, no required time of day. You can use any bait or none at all and still have a shot at hooking it. That said, its spawn rate is low, so expect to fish for a while before it shows up.
When you do hook it, don’t panic — the Depths Key is actually one of the easier reel-ins in the game. It moves slowly and predictably across the fishing bar compared to most rare catches, so as long as you’re paying attention, you shouldn’t lose it.
A practical tip here: don’t leave the server or quit out immediately after catching the key on some versions of the game, since older mechanics treated it as a one-time-use item that could be lost if you didn’t use it promptly. On current updates, once the gate to The Depths has been opened on a server, it tends to stay open permanently, meaning you and other players won’t need to keep re-fishing for new keys every single visit. Still, treat the key as precious the moment you get it — use it, don’t sit on it.
Opening the Gate
With the Vertigo bestiary completed and the Depths Key in hand, make your way to the large door found near the glowing red crystals in Vertigo. You’ll find an NPC called The Keeper sitting beside it. Interact with him while holding the key, and the gate will open with a smoky animation.
Past the gate is a short obby — a platforming section with floating stones that can be a little finicky, especially if you’re not used to precision jumping in Roblox. If you have access to a Glider or Advanced Glider item, you can often skip this obby entirely by flying over it, which saves a surprising amount of time if you’re planning to make multiple trips.
Push through the narrow passage at the end, and congratulations — you’re officially inside The Depths.
Step Two: Understanding the Depths Environment
The Depths is a dark, steep cave-like area lit mostly by glowing red crystals on the walls. Unlike more open fishing zones, this is a tighter, moodier location, and it’s worth taking a moment to get your bearings before you start casting seriously.
Here’s the good news: the Barreleye isn’t confined to some obscure micro-zone within The Depths. It can spawn anywhere in the general fishing waters of this area. You don’t need to hunt down a specific “Barreleye pool” the way you might for certain other exclusive spawns tied to limited-time events. Just find open water within The Depths and you’re in the right general zone.
That said, getting the location right is only step one. Now we need to talk about what actually tips the odds in your favor.
Step Three: The Bait That Actually Matters — Deep Coral
If there’s one single factor that separates people who catch a Barreleye in a reasonable amount of time from people who fish for hours with nothing to show for it, it’s bait. The Barreleye has a strong preference for Deep Coral bait, and showing up without it is like trying to catch a fish that likes worms while you’re holding a handful of bread.
What Is Deep Coral?
Deep Coral is a Legendary-rarity bait type. It’s not something you can buy off a shelf directly — you obtain it by opening Coral Geodes, which are items you catch while fishing in a different area called the Desolate Deep.
This means your prep work technically starts before you even reach The Depths. If you know you’re planning a serious Barreleye session, it pays to make a stop in the Desolate Deep first and stockpile as many Coral Geodes as you can carry. Cracking these open doesn’t guarantee Deep Coral every time — there’s some randomness in what a geode gives you — so the more geodes you bring, the more consistent your bait supply will be once you’re actually fishing for the Barreleye itself.
Why Deep Coral Specifically?
Bait in Fisch generally modifies your stats for the fishing minigame — things like Luck (your chance of encountering rarer fish), Lure Speed, Resilience, and Minigame Progress. Deep Coral trades away some Luck in exchange for a solid boost to Resilience, but more importantly, it’s the specific bait type the Barreleye is drawn to. Using bait the fish actually favors meaningfully increases the odds that it shows up on your line rather than yet another common catch.
If you only take away one practical tip from this whole guide, let it be this: don’t fish for the Barreleye without Deep Coral equipped. Everything else you do — location, timing, rod choice — matters, but bait preference is doing a lot of the heavy lifting behind the scenes.
Stocking Up Efficiently
Because Deep Coral requires a separate fishing trip to source, a lot of players make the mistake of bringing just one or two pieces into The Depths and burning through them in the first twenty minutes. Don’t do this. Before you commit to a serious Barreleye session, spend real time in the Desolate Deep cracking open geodes until you have a healthy stockpile. It’s also worth checking whether a Merchant NPC in that area sells Deep Coral or the geodes directly — vendor stock can sometimes save you a chunk of fishing time if the option is available on your version of the game.
Step Four: Timing Your Fishing Session
Bait gets you most of the way there, but timing adds another meaningful layer on top. The Barreleye has clear preferences for when it’s most likely to appear.
Night Time in Summer
The single best combination reported by players who’ve farmed this fish consistently is nighttime during the Summer season. Fisch runs an in-game day/night cycle along with rotating seasons, and lining these two conditions up noticeably improves your odds compared to fishing at a random time.
The good news is that weather doesn’t appear to matter here. Rain, clear skies, storms — none of it seems to meaningfully swing the Barreleye’s spawn chance one way or the other. That’s one less variable to stress about. Focus your energy on hitting night + Summer, and don’t worry about waiting out a weather pattern on top of it.
Being Patient With the Cycle
If you load into The Depths and it happens to be daytime or the wrong season, you have two real options: keep fishing anyway (since the fish can technically still appear outside its preferred window, just less often) or step away and come back once conditions shift. If you’re the type of player who likes efficiency over grinding through unfavorable odds, waiting for night and Summer to align before committing your Deep Coral stock is the smarter play. Coral isn’t infinite, and you want each cast made under it to count for as much as possible.
Step Five: Picking the Right Rod
Bait and timing control whether the Barreleye shows up in the first place. Your rod controls whether you actually land it once it’s hooked.
Remember that -15% progress speed penalty we mentioned earlier? That’s not a minor inconvenience — it directly fights against your ability to fill the progress bar during the reeling minigame, and combined with the Barreleye’s erratic movement across the fishing bar, it’s easy to lose a fish you waited an hour to hook.
This is where rod stats matter. You want a rod with strong Resilience and solid control, since these help offset both the progress penalty and the fish’s darting movement. Rods commonly recommended for this fight include the Sunken Rod and the Rod of the Depths — the latter of which is actually purchasable inside The Depths itself for a hefty in-game currency price, making it a natural investment if you’re planning to spend a lot of time in this area anyway.
If you’re using a lower-tier rod when the Barreleye finally bites, you’re rolling the dice twice — once on the spawn, and again on the catch. Don’t undercut all that setup work with the wrong equipment.
Step Six: Nailing the Reel-In
Even with the right rod, the actual minigame deserves some attention on its own.
Fisch’s reeling minigame works by keeping a moving bar aligned with a target zone that shifts across the screen. Progress fills up while you’re inside the zone and drains when you’re not, at a rate of roughly 12% per second in either direction. The game locks your inputs for the first 1.2 seconds or until you reach 20% progress, so don’t panic if your first click or tap doesn’t seem to do anything — that’s expected.
Because the Barreleye moves erratically, staying glued to the zone requires more attention than a typical catch. A few habits help:
- Don’t get impatient and overcorrect. Erratic fish punish players who yank the bar too aggressively in response to sudden movement. Smaller, controlled inputs tend to track better than large panicked ones.
- Use the shake mechanic wisely during luring, if you’re in that phase — each shake shaves time off the wait before the actual minigame begins, which matters when you’re trying to maximize casts during a limited Deep Coral supply.
- Aim for a clean run rather than a risky one. A “perfect catch,” where progress never drops during the minigame, nets you bonus currency and extra experience — a nice bonus on top of finally bagging the fish itself.
If you do lose the fish mid-reel, don’t take it as proof your setup is wrong. Even with ideal bait, timing, and rod choice, the Barreleye can still slip away due to its difficulty. Treat a lost catch as bad luck on the execution, not a sign to change your whole strategy.
Common Mistakes That Waste Your Time
Before wrapping up, it’s worth calling out a few things that quietly sabotage a lot of Barreleye attempts:
Fishing without Deep Coral. This is the single biggest time-waster. Regular bait might technically still let the fish spawn, but you’re fighting against much worse odds for no good reason.
Ignoring the season and time of day. If you’re fishing during the day in Winter with a full stack of Deep Coral, you’re burning premium bait under bad conditions. Check the season and daylight cycle before committing your stock.
Bringing a weak rod into The Depths. Getting all the way to a hooked Barreleye only to lose it because your rod couldn’t handle the progress penalty is a genuinely painful experience. Gear up before you commit serious fishing time here.
Giving up after one bad session. Mythical-rarity fish are, by design, not guaranteed within any specific number of casts. If you’ve done everything right — right bait, right time, right rod — and it still hasn’t shown up, that’s normal variance, not a sign you’re doing something wrong.
Final Thoughts
The Barreleye isn’t a fish that rewards blind luck — it rewards preparation. Every piece of the puzzle matters: unlocking The Depths in the first place, stockpiling Deep Coral from the Desolate Deep, timing your session for nighttime in Summer, equipping a rod that can handle the reel-in penalty, and staying calm during an erratic minigame fight. Skip any one of those steps and you’re relying on pure chance to carry you. Nail all of them, and you’re just waiting for the odds to catch up to your effort.
It’s still going to take time — this is a Mythical fish behind a genuinely long unlock chain, not a quick afternoon catch. But now you’re not fishing blind. You know exactly what to bring, when to show up, and how to close the deal once that line finally goes tight. Stock up on Deep Coral, wait for the night sky over a Summer sea, and go get your Barreleye.

Alex Smith
I’m a dedicated gamer who loves exploring games, mastering gameplay mechanics, and sharing gaming knowledge. I stay updated with the latest releases, tips, and strategies to improve performance and enjoyment. Gaming is my passion and my skill.